Heirloom Summer Dress {tutorial}
UPDATE: I'm still around but not in blogging. To see what I've been up to click here.
Last summer my husband and I took our daughter to visit his family in Sweden. It was the first of many trips she'll ever take there. During our visit my husband's grandmother ask me if I wanted to look through her stash of lace and fabric that she had been holding onto but didn't think she'd ever get around to using. Among the items that she had been saving was handmade lace. I can't tell you how old this lace is but I can say that it is beautiful and delicate and special. This is why it makes me nervous to actually use it! However, it just seemed like the perfect little embellishment for this little dress...so I did!


Here's what you'll need:
2 coordinating fabrics
1/2 yard for the body (18-24 months old)
1/2 yard for the bodice or 1 fat quater
Disappearing fabric marker
Scissors
Sewing machine/Serger
Thread
Ruler/Yard stick
Button
Ribbon/lace/elastic for button loop and bodice embellishment
Start by cutting the following:
1- Outer bodice 10 1/2"h x 12"w (first fabric)
1- Inner bodice 10 1/2"h x 7 1/2"w (first fabric)
2- Body 16"h x 20"w (second fabric)

These are the measurements to use on the inner and outer bodice pieces, mark them on the wrong side of the fabric. Cut out the hole and down the line on both the inner and outer bodice.

Finish the long edges of the inner bodice by either serging or ironing over twice and stitching a seam.

Make a loop out of your lace or elastic.

Place the inner bodice on top of the outer bodice RIGHT sides together. Place the loop at the to of the cut line with the loop on the inside.

Sew an 1/8" seam completely around the hole and back opening.

Turn right side out and iron around the neck line.
Next take both of your body pieces and gather the tops. To see how to gather refer to this tutorial.

Use your bodice to figure out how much to gather, making an even gather all the way across.

Close up on the gathering technique.

Lay the body RIGHT sides together on top of the bodice, lining the raw edges together. Serge or stitch a 1/4" seam all the way across.

Repeat for the other side of the dress. For a finished look I then serged all the way up both sides of the dress as well as the bottom of the body.

Fold the dress RIGHT sides together and stitch the sides closed leaving the arm hole open.

Iron under the arm hole and stitch an 1/8" seam all the way around the arm.
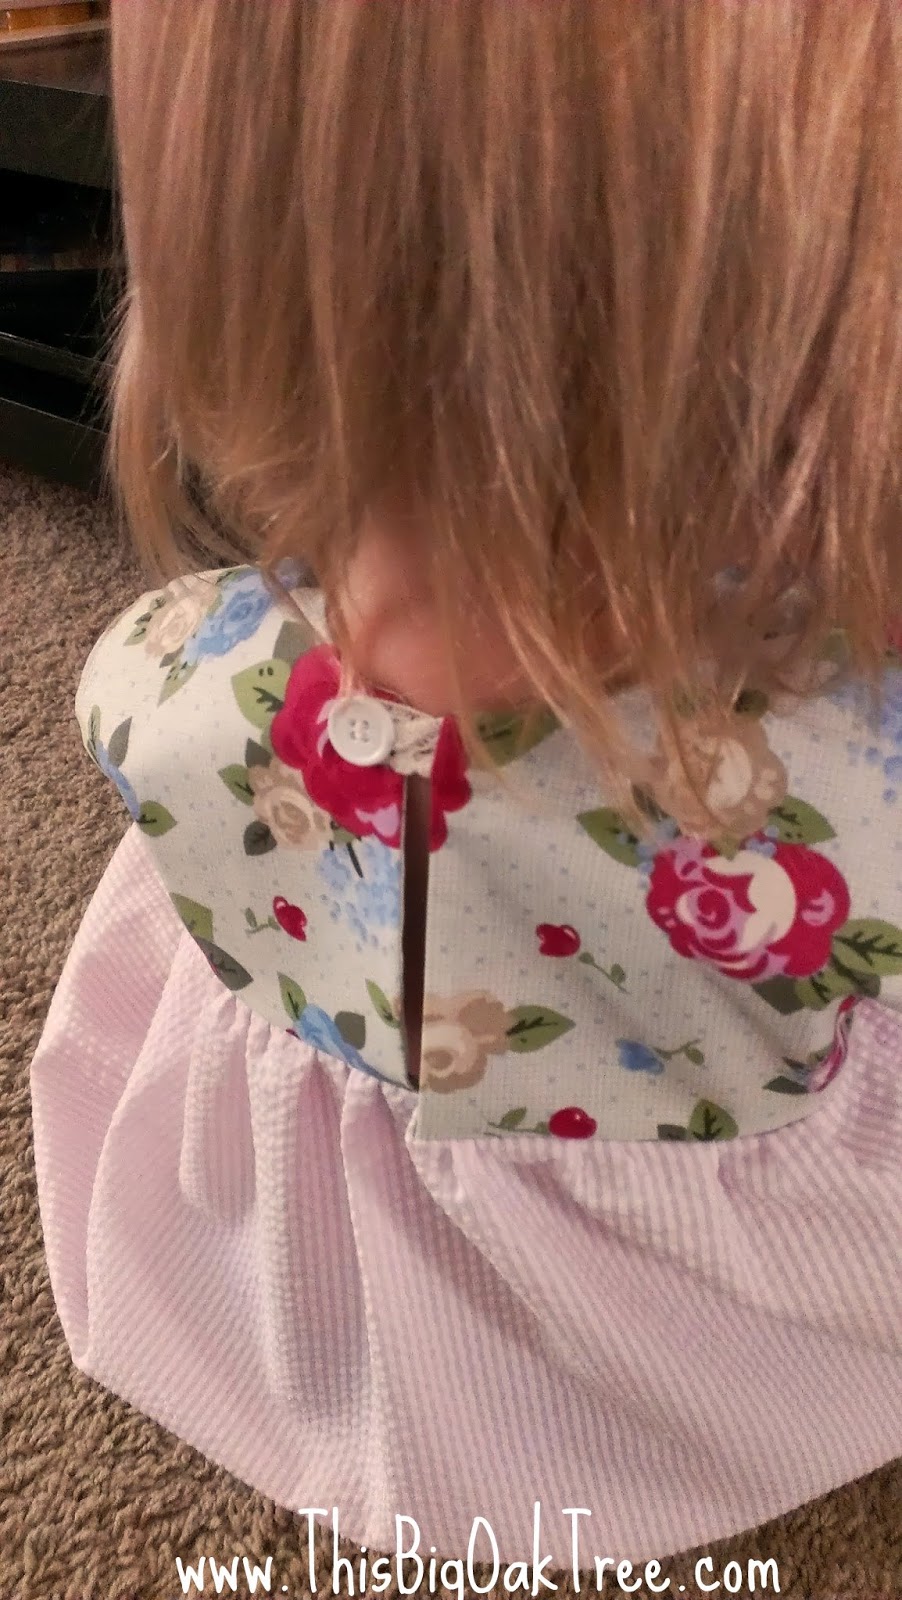
Don't forget to add the button! This you can do by hand or with your machine.
Last but not least, fold up the bottom 1/2" and iron in place then stitch a 1/4" seam all the way around the bottom of the dress (if you've serged the bottom). If you have not serged the bottom fold up the bottom 1/4" and again another 1/4", iron and stitch a seam all the way around.
And if you're interested in adding the lace around the bodice simply cut the lace just a little longer than the front bodice tucking the ends in under the armhole and stitch in place.

Can I just say how impossibly difficult it is to get a toddler to pose for a picture???


This one's my favorite. Taking a picture of momma taking a picture of her.
Happy Crafting!


This is so cute, Amy! Your baby model is adorable. It looks so much easier than I thought to make a lovely little dress. I love these tutorials!! I have been missing them lately.
ReplyDeleteTunic is so cute. And yes, I know how hard it is to take a picture of a toddler.
ReplyDeleteThanks for all your sweet and pretty tutorials! I love your methods and fabric examples!
ReplyDelete