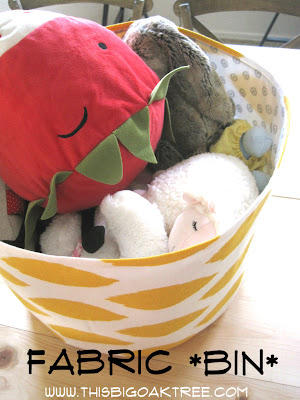
Fabric Bin {tutorial}
My kids got toys coming out the EARS!
We started out with a few little baskets and then the pile of toys just kept growing...and growing...and growing. SO...I got sewing! Hey that rhymes!
I needed my basket to be BIG...did you see that size of that smiling strawberry?
It stands 14" high and is 17" in diameter, the circumference is 52 1/2"...the bin not the strawberry ;)
Here's what you'll need:
2 coordinating fabrics both- 1 1/2 yards of non-directional fabric keeping in mind that the 52 1/2" circumference will come from one long piece that will run the length of the fabric. OR buy fabric that is wider than the standard 44" in which case I'd get a yard.
1 1/2 yards of heavy weight fusible interfacing
Fabric measuring tape
Disappearing ink fabric marker
Ruler
Scissors
Sewing machine
Thread
Iron
Ironing board
I measured out how big I wanted my circumference to be with a fabric measuring tape.
For the diameter I made the best circle I could and laid down my ruler. I added and extra 1" to this measurement. I double checked the other direction of the circle to make sure 17" was accurate.
It was 17" so I made it 18"
I cut out an 18"x18" square in both the inner and outer fabrics. I folded the square in quarters and drew a rounded edge.
I cut off the rounded edge and did the same to the inner square piece.
There you can see my two circles from the square pieces I cut.
Next I took the fusible interfacing and fused it to the WRONG side of the outer fabric. Then I place the inner and the outer fabric RIGHT sides together and serged/stitched them together along the longest side.
Then I flipped the liner over placing the WRONG sides together again and pressed the liner down with the iron. I let 1/4" of the outer fabric show on the top as shown above.
Then I top stitched the inner and outer fabric together.
Second view of the top stitch.
Then I serged both of the short ends to keep them from fraying. Then I placed the short ends together placing outer fabric RIGHT sides together and stitched the two ends together.
I pressed the seam down and stitched the flap open and the top.
I then placed the circle pieces WRONG sides together and serged them together.
Another view.
Then keeping the basket inside out I pinned the bottom to the outer walls.
Close up on the pinning. I stitched the bottom to the outer walls and trimmed excess fabric off. It's important to note that it's always better to have the bottom circle too big than too small. If it's too small then the side walls will get bunched. If it's too big you can always cut off the excess after it's sewn on. Just keep checking it as you're sewing it on and tightening the bottom as you go.
Turn right side out and there you have it!
What a hit! The fabric makes it so much easier for her to reach into and get things out, rather than the wicker baskets I had before.
Lots to discover in there...and there's that giant strawberry again :)
Happy Crafting!


Adorable! My boys could certainly use a few of those around the house! Thanks for sharing the tutorial!
ReplyDeleteI don't know how I managed to miss that you have a blog too! It's super cute! I went to "follow" but the button is missing...I'll try again! Thanks for all your encouraging comments :)
DeleteVad duktig du är, Amy!
DeleteCute idea and funky fabric!
ReplyDeleteI'm scared of circles but I may have to give this a try! Better than throwing out old toys constantly to make them fit into the impossibly small toy basket we use now.
What a great idea! I believe I will be trying this :) Thanks!
ReplyDeleteChrissy @ Everyday with the Jays